Why Couples Choose a Naked Wedding Cake for Contemporary Weddings
Couples choose naked wedding cakes for their simple beauty and flexibility. The exposed layers create a homemade, approachable look that works in cozy barns or modern city lofts. A skilled baker or cake designer can customize the cake with unique textures, varied filling colors, and flavor combinations that reflect your preferences.
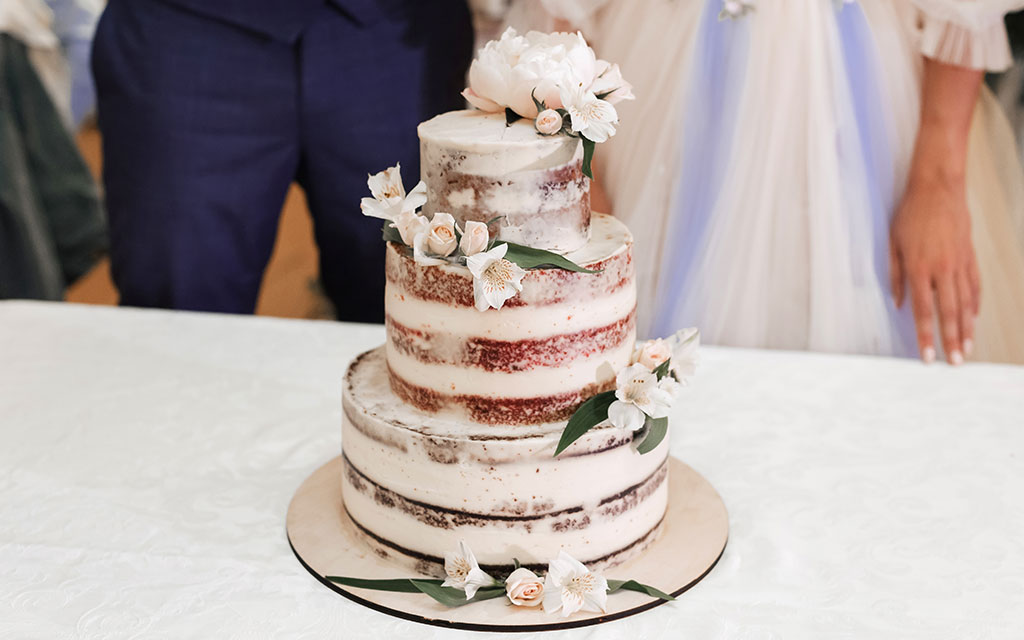
The rustic charm draws couples planning farmhouse weddings or countryside celebrations. The thin frosting lets the golden sponge and jewel-toned jam fillings shine through, creating an earthy appearance. Adding sunflowers, wheat stalks, or rosemary sprigs enhances the rustic feel without overdoing it.
Minimalist wedding cakes work for modern celebrations where clean lines take priority. These feature the same exposed structure with restrained decorations like white orchids, gold leaf accents, or powdered sugar dusting. This simplicity lets the cake’s taste and texture become the star.
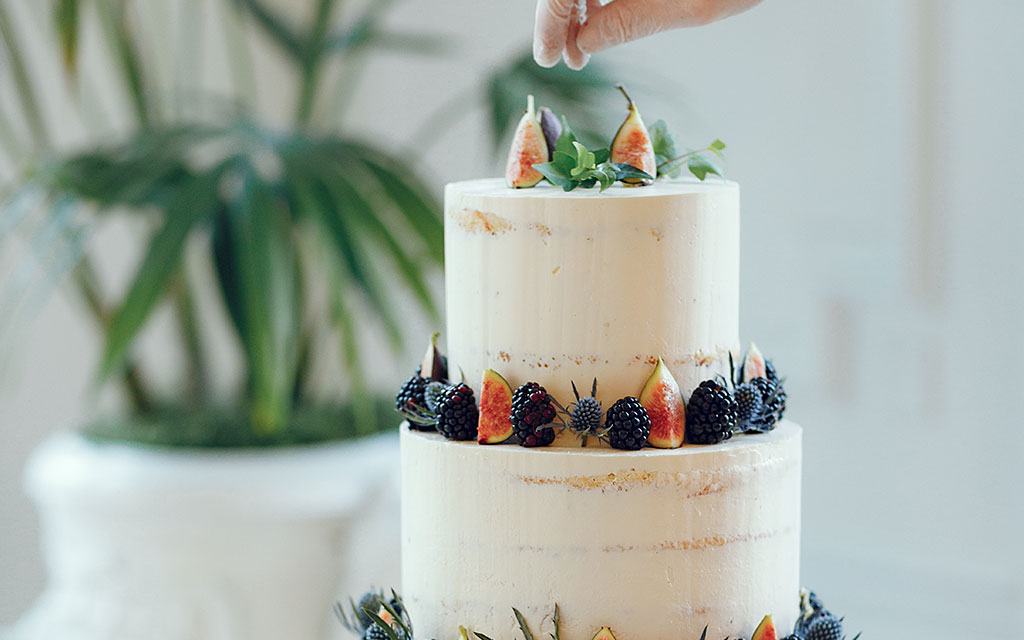
Naked cakes also align with boho wedding themes. They can be decorated with dried flowers, pampas grass, fresh figs, and trailing greenery. The natural appearance complements layered textiles, vintage furniture, and outdoor settings.
For couples on limited budgets or who enjoy hands-on projects, naked cakes present an ideal DIY wedding cake opportunity. With basic tools, a clear plan, and practice runs, creating an impressive naked cake becomes achievable. Freezing layers ahead, seeking guidance from tutorials, and keeping decorations simple makes the process manageable.

| Feature | Why It Matters | Best Match |
| Exposed layers | Shows texture and filling while creating authentic rustic appeal | Farmhouse weddings, boho celebrations, garden parties |
| Minimal frosting | Reduces both labor time and ingredient costs while highlighting sponge quality | Minimalist weddings, budget-conscious couples, chic modern celebrations |
| Natural decorations | Adapts easily to season and theme using fresh or dried elements | Boho themes, Mediterranean settings, autumnal celebrations |
| DIY-friendly steps | Lowers overall cost and remains accessible for home bakers with proper planning | Couples on tight budgets seeking personalized touches |
| Cake designer input | Ensures proper structure, accurate portioning, and food-safety guidance | Complex tiering arrangements or accommodating dietary variations |
Design Elements that Define Modern Naked Cake Styles
Modern naked cakes blend simplicity with visual impact using airy sponge textures and a light finish. These designs balance casual and polished aesthetics.
Exposed Cake Layers and the Thin Layer of Buttercream
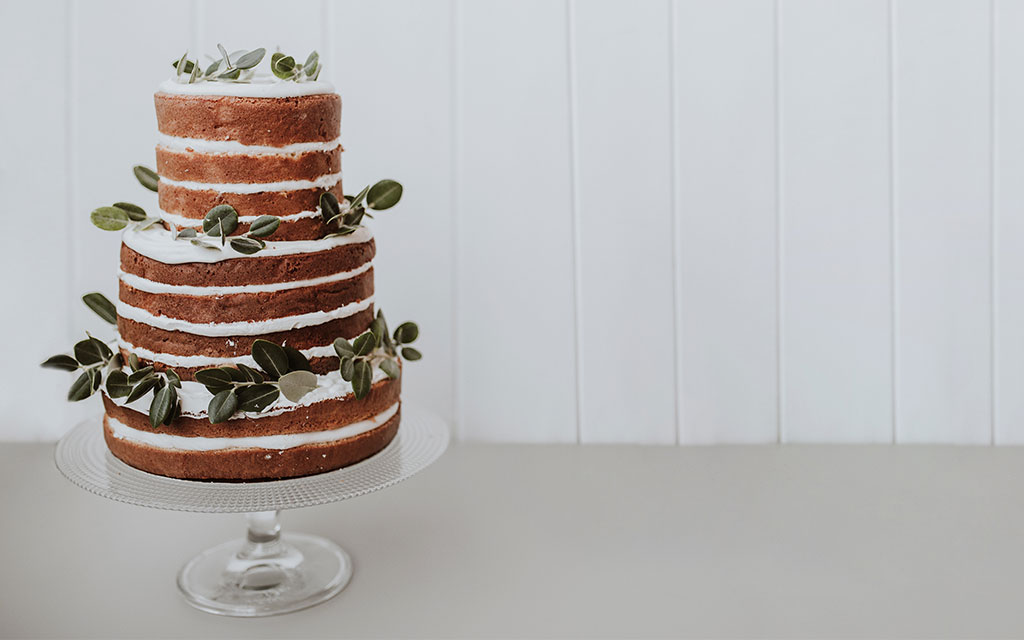
The defining feature centers on visible layers and strategic buttercream application that partially covers the sides without concealing the structure. This creates a rustic look that works in barns or city lofts. The contrast between cake layers and cream-colored filling creates visual interest through natural color variation.
Use of Fresh Flowers, Greenery, and Herbs for Decoration
Designers carefully position fresh flowers on naked cakes while keeping them food-safe. Popular choices include garden roses, ranunculus, and eucalyptus branches. Use blooms that haven’t been treated with pesticides and position them using food-safe barriers like floral picks.
Fresh herbs add unexpected touches that double as aromatic elements. Rosemary brings pine-like scent and structure, sage adds gray-green tones, and lavender contributes purple blooms and calming fragrance.
Incorporating Fresh Berries, Figs, and Seasonal Fruit as Focal Elements
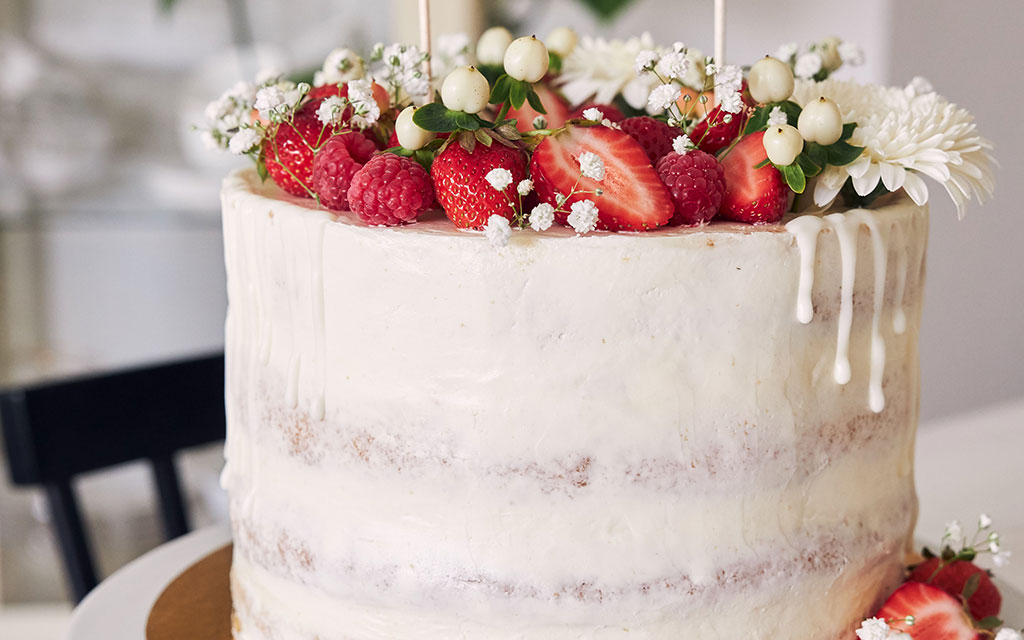
Adding fresh fruit transforms a simple naked cake into a show-stopping centerpiece. Strawberries bring bright red color, blueberries add purple-blue tones, and raspberries offer vibrant pink-red hues. Figs work beautifully for fall wedding cakes, bringing rich burgundy interior color when sliced..
Citrus slices, grapes, and stone fruits work wonderfully for different seasons. Consider the fruit’s moisture content and structural integrity to avoid seepage issues.
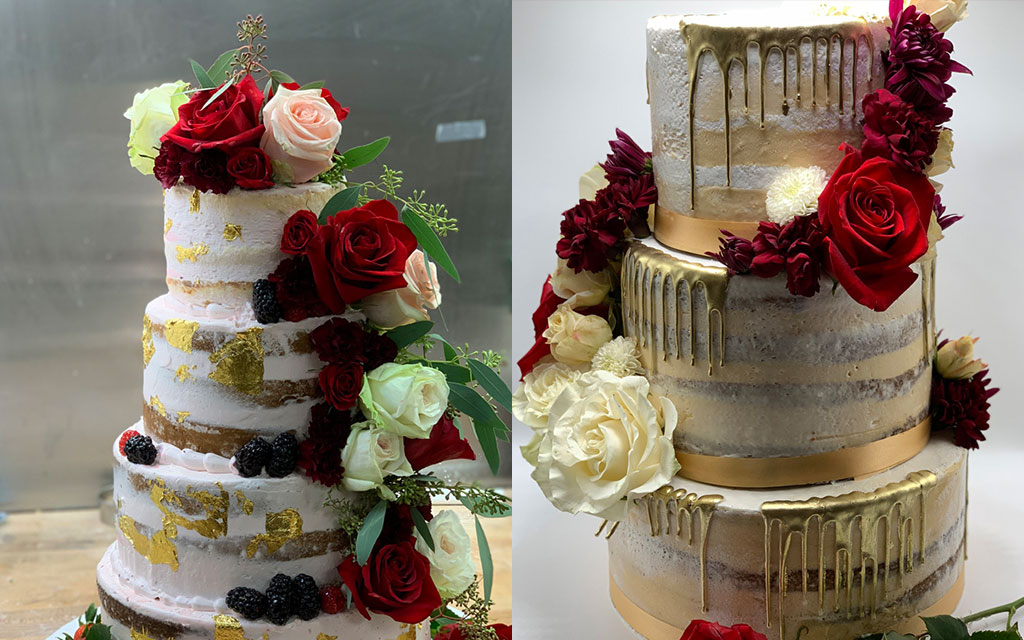
Gold Leaf, Chocolate Drips, and Other Luxe Accents
For upscale celebrations, decorative elements like edible gold leaf or chocolate drips create striking focal points. Gold leaf catches light and adds shimmer that elevates the rustic base. Chocolate drip effects using dark ganache create dramatic vertical lines and rich flavor contrast. Additional accents might include French macarons, meringue kisses, or delicate piped borders.
| Design Element | Purpose | Best Pairings |
| Exposed cake layers | Highlights natural texture and showcases sponge color variations | Vanilla sponge for classic look, chocolate sponge for drama, semi-naked design for polish |
| Thin layer of buttercream | Provides essential moisture retention and creates subtle sheen | Swiss meringue buttercream for silky texture, tangy lemon curd for brightness |
| Fresh flowers cake | Adds natural fragrance and creates visual softness | Garden roses for romance, ranunculus for delicacy, eucalyptus for texture |
| Cake with fresh fruit | Introduces vibrant color and natural sweetness | Strawberries for classic appeal, figs for sophistication, blueberries for color, citrus for brightness |
| Gold leaf cake | Creates luxurious highlights and catches light | Edible gold with white sponge, dried palm fans for boho-glam fusion |
| Chocolate drip naked cake | Offers dramatic vertical contrast and adds richness | Dark ganache drip for intensity, salted caramel for warmth |
Flavor and Filling Trends for Naked and Semi-Naked Cakes
Modern wedding cake flavors emphasize straightforward tastes that let quality ingredients shine.. Bakers pair light sponges with complementary fillings that create balanced bites. Couples choose from classic combinations or create unique pairings that reflect their taste and wedding themes.
Vanilla, chocolate, and citrus sponges remain popular because they work with nearly any filling. Vanilla showcases quality ingredients, chocolate pairs well with berries or caramel, and lemon sponge works beautifully with lemon curd filling or fresh raspberries.
Filling choices range from classic vanilla buttercream to fresh fruit curds that add brightness and color, to jams that create jewel-toned layers. Rich fillings like chocolate ganache or salted caramel offer pleasant contrast against lighter sponges. Cream cheese frosting brings tangy notes, while flavored buttercreams add subtle complexity.
Texture plays a crucial role in memorable eating experiences. Pairing airy sponge with smooth buttercream creates classic balance, while combining light sponge with tart lemon curd introduces brightness that prevents heaviness. Complex pairings might involve chocolate sponge with fresh blackberries and caramel drizzle.
Contemporary weddings increasingly accommodate dietary restrictions with gluten-free and vegan options. Using buttermilk substitutes helps maintain tender crumb and tang in dietary-friendly versions. Professional bakers recommend clearly labeling specialty tiers and offering tasting opportunities so all guests feel included.
| Category | Typical Choices | Why It Works |
| Sponge Flavors | Vanilla, chocolate, lemon, red velvet, almond, bespoke flavor blends | Versatile foundations that accept various fillings and showcase different decoration colors well |
| Filling Options | Buttercream frosting, lemon curd filling, fruit jams, pastry cream, custards, ganache | Range from rich and buttery to bright and tangy for creating balanced flavor profiles |
| Texture Pairings | Airy sponge combined with velvety buttercream, tart curd paired with soft cream | Creates pleasant contrast and produces memorable mouthfeel that keeps guests coming back |
| Dietary Considerations | Gluten-free alternatives, dairy-free options, vegan formulations, buttermilk substitute use | Inclusive choices that preserve proper texture and ensure all guests can participate |
Styling Tips: How to Decorate the Cake Like a Pro
Decorating a naked cake becomes manageable with the right tools, a clear plan, and practice sessions. Breaking down the process into steps and embracing the intentionally imperfect aesthetic makes it achievable. A practice run using inexpensive ingredients helps identify issues before the wedding day.
Arranging Fresh Flowers and Edible Blooms Safely
Use food-safe picks or floral tape to prevent stems from touching the cake surface. Ensure flowers come from sources that guarantee no pesticide treatment. Safe choices include roses, chamomile, orchids, and rice flowers. Dried blooms add texture without moisture and hold up better in warm conditions. Arrange edible flowers in small clusters for intentional-looking focal points.
Layer Placement and Decorating the Cake Tiers for Balance
Step back frequently to assess overall composition. Simple asymmetric designs read as modern while keeping the exposed sponge visible. Concentrate decorative elements on one side or cascade them diagonally. Consider both physical and visual weight, especially with fresh fruit. Light berries work well as accent piles, while heavier figs or citrus need stronger support points.
Using a Turntable, Offset Spatula, and Bench Scraper for Clean Edges
A cake turntable makes frosting easier by letting you spin the cake smoothly while maintaining even pressure. The offset spatula works perfectly in tight spots or between layers where regular spatulas are too large. The bench scraper creates clean, sharp sides for the semi-naked look. Work in short passes and refrigerate between major steps to firm up buttercream.
Finishing Touches: Dusting with Icing Sugar, Piped Buttercream Accents, and Fruit Placement
Dusting with icing sugar creates a soft effect that brightens appearance and disguises minor imperfections. Apply just before serving since sugar can dissolve. Small piped buttercream accents frame decorative elements without overwhelming the minimalist aesthetic. Practice piping and fruit placement on a dummy cake first to build confidence.
Practical Baking and Assembly Advice for a Successful Naked Cake
Starting with a thoroughly cleaned kitchen workspace and organizing all your tools before beginning saves time and reduces stress throughout the baking and assembly process. Use a digital kitchen scale for measuring ingredients when possible rather than relying solely on volume measurements, which produces more consistent results since factors like how tightly you pack flour into a measuring cup can significantly affect the final outcome. Take time to sift dry ingredients together before incorporating them, which removes lumps and aerates the mixture for lighter, more tender cakes.
Properly greasing your pans and lining them with parchment paper ensures that your cake layers release cleanly without sticking or tearing, which becomes absolutely crucial when you’re planning to leave the sides exposed rather than covering mistakes with frosting. Pour batter as evenly as possible between your pans by weighing them after filling to ensure equal distribution, which helps layers bake at the same rate and finish with similar heights that stack more easily and create a more professional appearance.
Preparing Cake Pans, Batter Evenly, and Baking Tips
Choose appropriate tools for mixing based on what you’re making, understanding that different recipes benefit from different approaches. A stand mixer with the paddle attachment works best for dense batters that need thorough creaming of butter and sugar, while the whisk attachment produces lighter results for angel food cakes or recipes requiring whipped egg whites. Hand mixing remains perfectly acceptable for many recipes and gives you more control over avoiding over-mixing, which can lead to tough, rubbery cakes.
Test for doneness using a wooden toothpick or cake tester inserted into the center of each layer, looking for it to come out clean or with just a few moist crumbs attached rather than wet batter. Allow layers to cool completely to room temperature before attempting any trimming or stacking, which typically takes at least an hour or longer for thicker cakes. This cooling period prevents layers from compressing under their own weight when stacked and reduces the risk of melting your buttercream filling.
Line your pans with parchment circles cut to fit the bottom exactly, then spray or brush the sides with oil or butter, which creates a non-stick surface that releases easily. Weighing your batter portions ensures each pan receives equal amounts, preventing the frustration of discovering mid-baking that one layer is significantly thinner than the others. Position oven racks in the center position for even heat distribution, and rotate pans halfway through baking if you know your oven has hot spots that cause uneven browning.
Crumb Coat vs. Semi-Naked Frost: Spread a Very Thin Layer and When to Refrigerate
Apply a thin crumb coat first to seal any loose crumbs and create a smooth base layer that prevents crumbs from showing through your final frosting application. This initial coat should be thin but complete, covering all surfaces that will show in your final design even though it doesn’t need to look perfect since it’s just a foundation. The crumb coat technique becomes less critical for naked cakes where some texture is acceptable, but it still helps create cleaner lines and more professional results.
For the semi-naked finish that defines this cake style, spread a thin layer of buttercream over your crumb coat using your offset spatula and bench scraper to control the amount of coverage. The goal involves applying enough buttercream to create slight coverage and add moisture while still allowing the cake layers to show through clearly, which requires a light touch and some practice to master. Refrigerate the cake for at least 30 minutes between the crumb coat and final layer, which firms up the buttercream and makes achieving those clean edges much easier since the frosting won’t smear or drag under your tools.
Cooling, Thaw Overnight Strategies for Frozen Layers, and Transporting the Cake
Freezing wrapped cake layers several days or even weeks before your wedding offers tremendous practical advantages by spreading out your workload and actually improving texture in many recipes as the freezing process helps the moisture distribute more evenly throughout the sponge. Wrap each cooled layer tightly in plastic wrap followed by a layer of aluminum foil to prevent freezer burn, then label everything clearly with the flavor and baking date so you don’t mix up different batches.
Thaw overnight in the refrigerator rather than at room temperature, which prevents condensation from forming on the surface and potentially making the exterior soggy. Bring layers to room temperature before filling and frosting by leaving them out for about an hour, which makes the cake easier to work with and ensures your buttercream spreads smoothly without the cold cake causing it to set too quickly. This gradual temperature adjustment produces better results than rushing the process.
Secure completed tiers on sturdy cardboard cake boards that extend slightly beyond the cake’s diameter, providing a stable base for transport and display. Box the cake carefully using a bakery box that provides adequate height clearance without touching decorations, and use non-slip shelf liner or damp paper towels under the base board to prevent shifting during transport. Drive carefully over bumps and avoid sudden stops that could cause tiers to slide or decorations to shift, and bring emergency supplies like extra buttercream, fresh fruit, and your decorating tools for quick repairs if needed.
Step-by-Step Staging: Stacking Tiers, Using Supports, and Placing Your Cake on a Stand
Use wooden dowels or thick plastic straws as internal supports between tiers, cutting them to height so they sit flush with the cake top rather than poking up above the surface. Cardboard tier circles between each layer provide additional stability and make it easier to position upper tiers accurately without the risk of them sliding around on buttercream, which can lead to disaster if a heavy tier shifts after you’ve already added decorations. Center each tier on its board carefully before adding the next level, and test stability by gently pressing on the top to ensure nothing wobbles or shifts.
Place your completed cake on your chosen cake stand carefully, whether that’s a simple white pedestal, rustic wooden slice, or metal stand with vintage details. Keep essential tools nearby during assembly including simple syrup, turntable, offset spatula, and bench scraper for final adjustments.
DIY and Working with a Cake Designer: Planning Your Naked Wedding Cake
Decide early whether you’ll make the cake yourself, ask a friend, or hire a professional cake designer. This helps you budget appropriately and avoid last-minute stress.
If you work with a professional designer, bring visual inspiration including pictures of berry arrangements, fig and floral designs, and the overall aesthetic you want. Schedule a consultation covering guest count, flavor preferences, dietary restrictions, display location, and setup logistics.
For DIY enthusiasts, invest in quality tools including a cake turntable, offset spatulas, and a stand mixer. Create a detailed baking plan with practice sessions, a timeline, and buffer time. Don’t skip cake tastings to narrow down flavors. Plan transport carefully and assemble a repair kit with extra buttercream, fresh decorations, and essential tools.
Good planning combined with realistic expectations leads to beautiful results. Naked cakes succeed by celebrating natural beauty rather than demanding absolute perfection.
Your Perfect Wedding Cake Starts at Mia’s Bakery
When you’re ready to transform your vision into reality, Mia’s Bakery brings over a decade of experience creating stunning naked and semi-naked wedding cakes for New York couples across all five boroughs. Our Brooklyn flagship location specializes in customizing every detail from sponge flavors to seasonal fruit selections, ensuring your cake reflects your personal style while meeting the practical needs of your celebration. We source fresh, quality ingredients and work closely with you through tastings and consultations to create a cake that tastes as incredible as it looks.
Our expert bakers understand the technical aspects that make naked cakes successful, from achieving the perfect crumb structure to applying that signature barely-there buttercream finish that defines the style. We accommodate dietary restrictions without sacrificing flavor or appearance, and we handle delivery and setup across all NYC locations so you can focus on enjoying your day. Whether you’re planning an intimate gathering or a grand celebration, Mia’s Bakery delivers the professionalism and creativity that turns your wedding cake ideas into an unforgettable centerpiece that delights both eyes and taste buds.
Visit our showroom to see current wedding cakes, schedule your tasting, and start planning the perfect naked wedding cake for your celebration.